
Ultimate West Weald Zone Guide

West Weald Area Description
“West Weald is my home and I’ll protect it with my life! From Sutch in the west, to Rustwall in the east, and all along the Gold Road, I’ll help keep Skingrad and the Weald safe from all enemies. This I swear!”—Tribune Alea Idolus
Scribing was also introduced in the Gold Road chapter. Click here for the Ultimate Scribing Guide.
Contents
Need specific info? Click these quick links to go directly to each section.
What Is A Crafting Set Station?
A crafting set station is a crafting area that allows you to craft a specific set piece of armor. Often there are additional requirements, like a number of traits that must be researched before you can make an item of a specific set. While you can make generic pieces at crafting set stations, these are the only areas where you can the specific set that is listed. There is one exception – attunable crafting tables (which are ‘tuned’ to replicate set stations) can be obtained and placed in houses for use.

On your map, crafting set stations appear with a blackened crafting icon when you are close to a location. Once the set station has been visited, the icon turns white.

West Weald Crafting Set Stations
- Deserter’s Lagoon – Threads of War
- Leftwheal Grainery – Highland Sentinel
- Singer’s Outpost – Tharriker’s Strike
How To Obtain Overland Set Pieces
Players are rewarded for each boss kill with item/items from that boss’s loot table.
- Delve bosses drop a waist, foot, or another unique item piece.
- Overland World Bosses drop a head, chest, leg, weapon, or unique item piece.
- Public dungeon bosses drop a shoulder, hand, weapon, or unique item piece.
- Chests at Dark Anchors or Dolmens drop a jewelry set piece.
Even with Curated Item Set Drops, bosses with a specific loot table will only drop curated items from their own loot table. Treasure chests have a chance to grant any set piece from the zone they are found in. Click here to learn more about curated set drops.
West Weald Overland Armor Sets
- Symmetry of the Weald (light armor)
- Macabre Vintage (medium armor)
- Ayleid Refuge (heavy armor)
What Is A Delve?
A delve in The Elder Scrolls Online is in essence a small dungeon. Delves usually contain a few enemies, at least one ‘boss’, and a skyshard. Delves can generally be completed solo. If you are a new player, you may want to explore delves with a friend. Most delves have an associated quest that you can get just inside or near the entrance. This quest is more a side story to the main quest of the area but does offer rewards for completing it.

On your map, delves appear with a blackened single torch. Once the delve is completed (by defeating the boss or bosses), the delve icon turns white.

West Weald Delves
Need specific info? Click these quick links to go directly to each section.
There are 6 delves in West Weald.

Fort Colovia
Fort Colovia has defended the northern reaches of West Weald since before the rise of the Longhouse Emperors. However, due to recent shortfalls in the Imperial Legion, it currently serves as a training ground for legionary recruits.

The Silent Bell
A band of deserters have taken control of Fort Colovia and driven out the small Legion cohort of raw recruits. Captain Dromius wants me to take Legionary Calvo back inside and ring the warning bell to alert the rest of the Legion to the danger. I need to enter Fort Colovia through the side passage so I can find the communique, the bell tower key, and the cohort payroll.
Fort Colovia Location
Travel southeast from the Valente Vineyards Wayshrine to find Fort Colovia.


Exploring and defeating the boss will reward you with the Fort Colovia Explorer achievement.
Inside Fort Colovia
Fort Colovia is inhabited by West Weald bear, welwas, and Dark Company enemies. This delve has one level, one boss, and one skyshard as noted on the map.


Deserter Marius Gallo
Deserter Marius Gallo is initially accompanied by two Dark Company enemies. He uses a sword and shield for heavy melee attacks. Gallo also instructs unseen archers from above to rain arrows on the enemy below while he sets bear traps in aoes intended to slow you down. Deserter Marius Gallo has a cone-shaped aoe followed by flaming breath. Lastly, Gallo swings his sword and slams it into the ground creating a large aoe and causing an earthquake. This can be interrupted. Avoid the aoes when possible. Defeat the Dark Company enemies first particularly focusing on any archers and battlemages as they are most damaging with their ranged attacks.

Completing The Silent Bell
You will need to locate the hidden items and ring the warning bell. Return to Captain Dromius Terrus to complete the quest and you will be rewarded with gold and the Legion’s Cleaver, part of the Macabre Vintage armor set.

Fryelight Cave
“Hunters have reported a troubling increase in tharriker populations in and around Fryelight Cave. The Count of Skingrad would appreciate any and all help in clearing out this den of beasts.” — Legionary Vontus Nirol

A Matter of Propriety
Grander Nemarcet was robbed of his dowry by a brigand and her pack of beasts. He asked me to retrieve his stolen belongings so he can finalize his marriage. I should search Fryelight Cave and retrieve what I can of Grander’s stolen dowry.
Fryelight Cave Location
Travel north from the Ostumir Wayshrine to locate Fryelight Cave.


Exploring and defeating the boss will reward you with the Fryelight Cave Explorer achievement.

Inside Fryelight Cave
Fryelight Cave is inhabited by death hoppers, spriggans, and wasps. This delve has one level, one boss, and one skyshard as noted on the map.


Scourgetail
Scourgetail is a large tharriker. He jumps, claws, and bites. He also creates an aoe and then exhales a black smoke which causes the aoe to move. Avoid the aoes when possible. Ranged attacks work well.

Completing A Matter of Propriety
You will need to find the 4 dowry items and speak with Grander’s bride-to-be, Amaurel Verdulis. Speak to Grander Nemarcet to complete the quest and you will be rewarded with gold and the Ring of Faithfulness, part of the Ayleid Refuge armor set.

Haldain Lumber Camp
“Dreams are fragile things. Sometimes they burn brightly and sometimes they are snuffed by the very roots upon which they were built.” — Commandant Salerius of the West Weald

Appointed Executor
I found a journal next to the corpse of an Imperial called Haldain. Haldain’s last wish was for someone to bring his belongings to his sister in Skingrad. Haldain’s journal said that his belongings can be found at his workbench nearby. I should take them.
Haldain Lumber Camp Location
Travel southeast from Wilburn’s Edge Wayshrine across the water to locate Haldain Lumber Camp.


Exploring and defeating the boss will reward you with the Haldain Lumber Camp Explorer achievement.

Inside Haldain Lumber Camp
Haldain Lumber Camp is inhabited by Wilburn spriggans, bears, senches, and Recollection enemies. This delve has one level, one boss, and one skyshard as noted on the map.


Aggression of Root
The Aggression of Root is a large spriggan that hovers above the ground. She has heavy swipes and creates root tangles that spawn Fauns to aid her. She will also scream creating a large cone-shaped aoe that will stun you in place temporarily. Focus on the adds and avoid the aoes when possible. Once defeated, you will see the corpse of Haldain Russus and find the quest for this delve.

Completing Appointed Executioner
You will need to travel to Skingrad after collecting Haldain’s belongings. Locate his sister, Lepida Russus to return to her his possessions. She will reward you with gold and a West Weald Lumber Supplies coffer that contains an assortment of woodworking materials.

Legion’s Rest
“While local caravans use Legion’s Rest as a safe haven during their long trips to and from Skingrad, historians note that it was pivotal during the time of Varen’s Revolt, acting as a rest stop for the Second Legion.” — Historian Varinia Scipio

Spilled Wine
Orissa Dellinoi’s caravan was transporting a rare and expensive wine when it was attacked by rogues in Legion’s Rest. She asked for my help in retrieving her stolen wine and finding her loyal companion, Lazen. I should search Legion’s Rest with Orissa Dellinoi for Lazen and the stolen Blue Aedral.
Legion’s Rest Location
Travel northeast from the Ortus Wayshrine to find the caverns known as Legion’s Rest.


Exploring and defeating the boss will reward you with the Legion’s Rest Explorer achievement.
Inside Legion’s Rest
Legion’s Rest is inhabited by Crystaljacks, Crystaljack Tamers, and other Crystaljack enemies. This delve has one level, one boss, and one skyshard as noted on the map.


Gilroy Vassinus
Gilroy Vassinus uses a sword and flaming aoes to inflict damage. He also summons swarms of Crystaljacks to aid him. Keep the adds down as much as possible. Avoid the aoes. Gilroy is easily defeated.

Completing Spilled Wine
You will need to find Larzen the dog and locate Orissa’s wine. Speak to Orissa Dellinoi to complete the quest and you will be rewarded with gold and the Merchant’s Waistband, part of the Macabre Vintage armor set.

Nonungalo
The name Nonungalo roughly translates to “place where few have lived.” This could be because the site was reserved for elite members of Ayleid society, or because it was used as a sacred burial ground for their dead. Or for some other reason we have yet to ascertain.

Unfinished Business
I met Faric Velain, a priest of Arkay, investigating the ruins of Nonungalo. He believes a group of undead necromancers are performing a ritual inside and asked me to help him stop it.
Inside Nonungalo, I need to burn the bodies fueling the spell and gather the ritual items. This will stop the undead necromancers.
Nonungalo Location
Travel north from the Fall’s Path Wayshrine to locate the Ayleid burial ground called Nonungalo.


Exploring and defeating the boss will reward you with the Nonungalo Explorer achievement.

Inside Nonungalo
Nonungalo is inhabited by Ayleid Vanquishers, Necromancer Ghosts, and Shardborn enemies. This delve has one level, one boss, and one skyshard as noted on the map.


Shattered Shard
The Shattered Shard is a large ogre-type mirrormoor creature. It has heavy hits and swipes. The Shattered Shard is surrounded by Bulworks who shoot shards at it that reduce the damage it takes. It will also slam the ground creating aoes containing mirror shards. The Shattered Shard will create a path-type aoe and a large mirrored shield appears in front of it. It will charge down that path doing heavy damage if you are inside the path. Lastly, he will use his mace to pound the ground creating large aoes filled with mirror shards that will explode. Focus first on the Bulwarks. Avoid the aoes when possible. Ranged attacks work well.

Completing Unfinished Business
You will need to burn three corrupted corpses and gather three ritual items. Speak to Priest Faric Velain to complete the quest and you will be rewarded with gold and the Spiteful Smiter, a piece from the Symmetry of the Weald armor set.
Varen’s Watch
“The fort currently known as Varen’s Watch has had different names at different times. It sort of just depends on who’s in charge at any given moment, I suppose. It was dedicated to Emperor Varen shortly after he claimed the throne.” — Commandant Salerius of the West Weald Legion

Cold Fires on the Watch
I found a dead legionary inside Varen’s Watch. She held a scroll that ordered her to ignite the signal fires atop its towers and walls to call for reinforcements. I should finish the job. The scroll marked four locations inside the Watch where the signal fires must be ignited. I should find and ignite them to alert the Legion.
Varen’s Watch Location
Travel east form the Sutch Wayshrine to locate the colovian fort known as Varen’s Watch.

Exploring and defeating the boss will reward you with the Varen’s Watch Explorer achievement.

Inside Varen’s Watch
Varen’s Watch is inhabited by Recollection Marsh enemies, mirrorplasms, and feral guardians. This delve has one level, one boss, and one skyshard as noted on the map.


Commander Halsheel and Vralkuun
Vralkuun is a large mirrored mantikora that accompanies Commander Halsheel. Halsheel uses a bow for ranged attacks. Vralkuun is the more aggressive and uses swipes, and his staff to inflict heavy damage. Halsheel develops a protective shield that minimizes his damage while he summons Recollection enemies. Vralkuun slams his staff to the ground, causing mirror shards to rise. Avoid the aoes when possible. Vralkuun will keep you on your toes dancing around his shards and swipes. Take advantage of any time Commander Halsheel’s protective shield drops.

Completing Cold Fires on the Watch
You will need to ignite all four of the signal fires. Speak to Captain Abitus to complete the quest and you will be rewarded with gold and the Legionary Greaves, part of the Ayleid Refuge armor set.
What Is A Public Dungeon?
Public dungeons are a type of dungeon that is non-instanced. This means that it can be accessed by anyone at any time. These dungeons are more difficult than delves. Public Dungeons contain at least one skyshard and often a group challenge that rewards a skill point. Each public dungeon also offers its own quests and achievements.

On your map, public dungeons appear with a blackened cave. Once the public dungeon is completed (by defeating the bosses/mini-bosses and all associated quests), the public dungeon icon turns white.

West Weald Public Dungeons
Need specific info? Click these quick links to go directly to each section.
There are 2 public dungeons in West Weald.

Leftwheal Trading Post
“It’s impressive what the baroness has accomplished at Leftwheal. I’d argue it’s a better trading hub than Skingrad, though I’d never let the count hear me say that. Still, she’s got a good sense for business, that baroness.” – Merchant Toutis Favonius

Leftwheal Trading Post Location
Travel north along the road from the Centurion’s Watch Wayshrine to locate the Leftwheal Trading Post.
Leftwheal Trading Post Quests

Caught In A Trap
Leftwheal Trading Post has fallen victim to an attack from within driven by shining beasts and cultists. Baroness Eliana Cossa has requested help in rescuing her citizens and ending the invasion.
Baroness Eliana Cossa saw townsfolk still trapped amid the rubble and a series of rituals to summon in more attackers. She asked me to deal with the recollection and free the injured townsfolk.

Completing Caught In A Trap
You must locate and save the 4 civilians and stop the 4 rituals. Speak to Baroness Eliana Cossa to complete the quest and you will be rewarded with gold, the Skill Style Color Whirlwind, Ochre Orange, and the Leftwheal Cleaver, part of the Ayleid Refuge armor set.
Inside Leftwheal Trading Post
Leftwheal Trading Post is inhabited by Recollection enemies, Shardborn enemies, and crystaljacks. This public dungeon has 7 bosses (including a group boss) and one skyshard as noted on the maps. Note: 1 boss (Zenfrit) is a named boss but not required to earn the achievement.

Leftwheal Trading Post Bosses
Leftwheal Trading Post has 7 bosses. To complete the dungeon, you will need to complete the quest and defeat all 7 bosses.
Click on the boss name for quick access to that section.
Hrakkzur
Harkkzur is a fractured remnant who can stand upright and has a scorpion-type tail.


Mechanics
Hrakkzur uses his tail for a powerful swinging attack. He also summons numerous lightning bolts in traveling aoes. Microplasms drop from the air during the battle. Avoid the aoes when possible. Focus on keeping the microplasms under control.
Klynklaynk
Klynklaynk is a mirrored ogre.


Mechanics
Klynklaynk slams the ground creating small aoes with mirror shards. He summons Shattered Shards to aid him in battle. The most deadly attack is a large aoe that explodes into flying mirror shards. Avoid the aoes when possible. Ranged attacks work well.
Olashyn the Twisted and Ranishyn the Marred
Olashyn the Twisted and Ranishyn the Marred are two female mages.


Mechanics
Both Olashyn the Twisted and Ranishyn the Marred used destruction staves and magical damage. Initially, they alternate fighting while the other is under a protective shield. While one is shielded, both are healed. The one fighting will disappear and their weapon will remain spinning overhead. It will slam into the ground creating an explosive aoe with mirror shards. Attack the available one as much as possible. The higher the damage, the quicker the other drops the shield.
Swarmkeeper Xvarcon
Swarmkeeper Xvarcon is a Recollection mage.


Mechanics
Swarmkeeper Xvarcon uses a destruction staff and lightning bolts to inflict damage. He also summons swarms of crystaljacks to aid him. Swarmkeeper creates a large aoe that he stands in or close to. Within seconds, a large lightning bolt hits the aoe causing it to explode with mirrored shards. Focus on keeping the crystaljacks under control. They can easily be overwhelming. Avoid the aoes when possible. Swarmkeeper Xvarcon is easily defeated.
Yrrkkyyn (group event)
Yrrkkyyn is a fractured remnant and is the group boss for this public dungeon.


Mechanics
Yrrkkyyn is under a protective shell with Shardborn and Recollection enemies around it. You will need to defeat 2 waves of enemies for Yrrkkyyn to join the battle. Yrrkkyyn has a powerful tail and also summons mirrored laser eyes, mantikoras, war mages, and more to aid him. Beware of the lightning aoes. Note that Yrrkkyyn can also move and attack from within the protective shell. Focus on the adds and attack Yrrkkyyn when possible.
Zenefrit
Zenefrit is a large mirrored atronach.


Mechanics
Zenefrit uses heavy swings and stomps to cause damage. He will summon ghosts of soldiers to aid him in battle. When Zenefrit pounds the ground, mirrored tentacles spawn. Avoid the aoes when possible. Keep the adds down. Ranged attacks work well.
Zvartek the Weapon Master
Zvartek the Weapon Master is a Shardborn enemy.


Mechanics
Zvartek primarily uses a bow for ranged attacks and will summon other warriors to aid him in battle. He will jump into the air, disappear momentarily, and when he lands it creates a lightning flash around him.
Achievements

Defeating all of the champions in the Leftwheal Trading Post will reward you with the Leftwheal Trading Post Conqueror achievement.
Note: Currently Zenefrit is not listed as a champion to be defeated to acquire this achievement.

Silorn
“You ever seen a minotaur go toe to toe with an army of undead? Messy business. Has a way of keeping you up at night. Makes for a fun bit of gambling though.” – Innkeep Nolus Barbula

Silorn Location
Travel southeast across the river from the Trader’s Luck Wayshrine to find Silorn. This public dungeon has 6 bosses (including a group boss) and 1 skyshard as noted on the maps.
Silorn Quests

Death and Titans
I met Toutis Mido outside the Ayleid ruins of Silorn. I agreed to help him recover Aetherial shards from the ruins, which are overrun with minotaurs and necromancers, by using a device called the Aetherial Alarum.
Toutis gave me a tool called the Aetherial Alarum and told me he’ll show me how to use it to retrieve the shards once we’re inside Silorn. I should lead the way.

Completing Death and Titans
Collect all four shards and speak to Toutis Mido to complete the quest. You will be rewarded with gold, the Blessing of Protection, Sky Blue (a Skill Style), and the Necromancer’s Skullcap, part of the Symmetry of the Weald armor set.
Inside Silorn
Silorn is inhabited by minotaurs, necromancers, wraiths, and Ayleid enemies. This public dungeon has one level, 6 bosses, and one skyshard as noted on the map.

Silorn Bosses
Silorn has 6 bosses. To complete the dungeon, you will need to complete the quest and defeat all 6 bosses.
Click on the boss name for quick access to that section.
Bloodmane and Spitetooth
Bloodmane and Spitetooth are two large tharrikers. Spitetooth is on the ground and Bloodmane is watching from a ledge above.


Mechanics
Spitetooth will be the first to engage. He has a scorpion-type tail and will use it to inflict heavy damage. In addition to clawing, he will also growl creating an aoe with a black cloud that can poison you. If you get too far away from Spitetooth he will jump to you. When Spitetooth is nearly defeated, Bloodmane will jump from the ledge to the ground creating a strong aoe. He is larger than Spitetooth but is equally aggressive. Avoid the aoes when possible. Neither Spitetooth nor Bloodmane are difficult.
Galrok the Burning
Galrok the Burning is a large minotaur.


Mechanics
Galrok the Burning uses a flaming mace for heavy-hitting melee attacks. He will also leap to you if you are too far away from him. Galrok slams the mace to the ground creating firey aoes. Avoid the aoes when possible. Although you need to be mindful to be near Galrok, ranged attacks do work well.
Jukheis the Dread
Juxheis begins as a necromancer but quickly turns into a large bone colossus.


Mechanics
Juxheis the Dread is found in human form but when battle begins, he quickly turns into a large bone colossus. Juxheis is aggressive. He uses heavy hits and stomps his foot creating large aoes that explode. Bone Flayers, wraiths, and Ayelid archers also spawn. Focus on the archers as they do the most damage. Avoid the aoes when possible. Ranged attacks work well.
Shaman Rezzutum and Bone-Breaker
Shaman Rezzutum is a Ayleid enemy and is accompanied by Bone-Breaker, a large ogre.


Mechanics
Bone-Breaker is first encountered. He uses heavy hits and swipes to cause heavy damage. Bone-Breaker also pounds the ground creating aoes. Shaman Rezzutum is off to the side inside a damage shield with an Aura of Protection totem. He doesn’t come into play until Bone-Breaker is defeated. Avoid Bone-Breaker’s heavy hits. Ranged attacks work well.
With Bone-Breaker defeated, destroy the Aura of Protection and the shield will disappear from Shaman Rezzutum. He uses a battleaxe for melee attacks. Shaman Rezzutum is easily defeated.
Shepherd of the Doomed
Shepherd of the Doomed is a large wraith.


Mechanics
Shepherd of the Doomed uses icy charges and causes aoes to form on the ground with icy shards inside. You must avoid the aoes when possible or you can be frozen in place for a few seconds. Shepherd of the Doomed isn’t difficult and melee attacks work well.
Viikor Brazen Hoof (group event)
Viikor Brazen Hoof is a large minotaur and serves as the group event for this public dungeon.


Mechanics
Viikor Brazen Hoof carries a large burning mace. He has heavy hits, and creates fiery aoes on the ground. He creates a path-type aoe and will charge through it. If you get too far away, Viikor will jump to you landing on top of you. You will need to stay relatively close to Viikor. Avoid the aoes when possible. Ranged attacked work well. Viikor Brazen Hoof is not difficult but his health is higher because he is the group event boss.
Achievements

Defeating all the champions in Silorn will reward you with the Silorn Conquerer achievement.
What Is A Trial?
Trials (also called raids) are referred to as endgame content for groups of 12 players. They are dungeons of a much larger scale. Trials require area-specific mechanics that require both teamwork and coordination. Players who complete trials are rewarded with items that cannot be obtained anywhere else in the game. Trials have both normal and veteran versions as well as veteran hardmode. Trials also feature a repeatable quest with the reward being a special coffer. Each trial will only reward one coffer per week.

On your map, trials appear with a blackened square icon with a skull and a plus sign. Once the trial is completed (by defeating the bosses), the trial icon turns white.

West Weald Trials
There is 1 trial in West Weald.
- Lucent Citadel – Mechanics Guide coming soon
Though shrouded in mystery, the Lucent Citadel stands as a gleaming structure in the sand of Fargrave’s wastelands. Records and tales differ on the nature of what lies within, but all agree that the arcane knot must be powerful enough to make another expedition of brave explorers take the risk.
Lucent Citadel Armor Sets
- Mora Scribe’s Thesis (light armor)
- Xoryn’s Masterpiece (light armor)
- Slivers of the Null Arca (medium armor)
- Lucent Echoes (heavy armor)
- Perfected Mora Scribe’s Thesis (light armor)
- Perfected Xoryn’s Masterpiece (light armor)
- Perfected Slivers of the Null Arca (medium armor)
- Perfected Lucent Echoes (heavy armor)
What Is A World Boss?
World bosses are powerful enemies often with their own unique abilities. They sometimes require groups of players to overcome. World bosses in DLC zones are significantly harder than other base game bosses.

On your map, world bosses appear with a blackened skull and crossed swords icon. Once the world boss is defeated, the world boss icon turns white.

West Weald World Bosses
There are 6 world bosses in West Weald.
Need specific info? Click these quick links to go directly to each section.
Stri the Fate-Eater at Broken Path Cave
Travel north from the Valente Vineyards Wayshrine to find the Broken Path Cave.


Mechanics Notes
Stri the Fate-Eater is a large fractured remnant. It has a scorpion-like tail and can also stand up on two feet. While standing on two feet Stri uses heavy-hitting swings. On four feet, it clasps his ‘hands’ together forming what looks like a spinning drill bit. Stri the Fate-Eater creates fast-moving clouds with lightning bolts. It also creates a cone-shaped aoe that will follow you if you step into it. After a few seconds, its ‘eye’ shoots a laser beam.
Stri the Fate-Eater will momentarily disappear. When it does so, a large mirror (Gaze of Mirrormoor), a large laser eye (Seeking Sphere), and mirrorplasms appear. If you step into the Sphere’s laser, it will follow you doing heavy damage. As you destroy the mirrorplasms, the Gaze mirror will destroy itself.
Stri the Fate-Eater will reappear and occasionally split into two versions. Each time the Seeking Spheres, Gaze of Mirrormoor, and mirrorplasms appear, the number will increase. This is the ‘easiest’ of the zone’s world bosses. Ranged attacks work well but the key is to stay moving and avoid the lasers whenever possible.
Achievement Earned

The first time you defeat this world boss you will earn the Fate-Eater achievement.
Fang and Talon at Centurion’s Rise
Travel west from the Ontus Wayshrine to reach Centurion’s Rise.


Mechanics Notes
Fang and Talon are large tharrikers with scorpion-like tails. They are accompanied by Rock Bone enemies including trappers, berserkers, and fire mages. Both pounce and claw causing heavy damage. Rock Bone Trappers can also set traps that will pin you in place.
Fang and Talon have lightning spit and growl creating an aoe with a black mist that moves around the area. These aoes only last a few seconds and then disappear.
You will see a golden protective shield over one or both bosses. At this time an Ogre Shaman will appear along with other Rock Bone enemies. This shaman will channel to Fang or Talon healing it. You can interrupt the ogre when it is channeling. It can also throw frost bolts, create ice shards on the ground that will slow your movement, and if you are close enough, it can swipe you. You must defeat all the enemies before the protective shield disappears. Note that Fang and Talon can still attack while under the shield!
With each use of the protective shields, the number of Ogre Shamans and other Rock Bone enemies increase.
Achievement Earned

The first time you defeat this world boss you will earn the Dethorned achievement.
Spinner Urthrendir at Fall’s Glade
Travel south from Fall’s Path Wayshrine to locate Fall’s Glade.


Mechanics Notes
Spinner Urthrendir uses a greatsword like a dual-wield weapon. He has a spinning swing attack and he can dash across the area. Spinner Urthrendir creates a cone-shaped aoe where another sword spins. He has a move that can be interrupted. Spinner Urthrendir will raise his sword and bolts will drop to the ground creating small poisonous aoes with tangled roots that will pin you.
This battle can be quite chaotic. With numerous aoes to avoid, you will need to also be on the lookout for rock-throwing trolls, wasps, lamias, and a particularly aggressive Bog Dog Bonecrusher.
You will see an Illusionary Mushroom in a glowing green. This must be destroyed. Lure Wasp Bombardiers near it and kill them. The explosion of the wasp destroys the mushroom. At the beginning of the battle, there will be only one. As the battle continues, an increasing number will appear.
At low health, Spinner Urthrendir creates a pinwheel-shaped aoe filled with tangled roots leaving little room to move without being pinned. Ranged attacks work well so you can stay on the run.
Achievement Earned

The first time you defeat this world boss you will earn the Disillusioned achievement.
Hessedaz the Baleful at Fortune’s Bluff
Travel southwest across the river from the Trader’s Luck Wayshrine to locate Fortune’s Bluff.


Mechanics Notes
Hessedaz the Baleful is quite powerful. It has heavy hits and uses a mace for melee damage. Hessedaz will create a path-type aoe and create a shield out of mirrors that it uses to charge down the path. It will also slam its mace into the ground creating an expanding aoe that explodes with mirror shards. When Hessedaz raises his arms, mirrored shards will crash into the ground.
Hessedaz the Baleful will dissolve into a puddle in the center of the area. On the outside perimeter, multiple mirrorplasms will slowly make their way toward that puddle. The more that make it to the puddle, the more Hessedaz heals. When all are either destroyed or reach the center, Hessedaz the Baleful will reappear. Each time it splits, the number of mirrorplasms will increase.
Hessedaz the Baleful’s aoes are pretty easy to avoid. Focus on the mirrorplasms as they will undo all the damage you do on Hessedaz. Achievement Earned

The first time you defeat this world boss you will earn the Shard Shatterer achievement.
Recollection Leaders at Frontier’s Cradle
Travel southeast from the Sutch Wayshrine to located Frontier’s Cradle.


Mechanics Notes
The Recollection Leaders include Keeper Taman, Venombow Daital, Rootstrider Maglin, and Greenspeaker Baedalas. While each uses a different weapon type. Venombow Daitel uses a bow. Keeper Taman uses a sword and shield. Rootstringer Maglis uses a mace. Greenspeaker Beadalas uses a battle axe. The most damaging is Venombow Daital with the ranged poison arrow attacks. Aiding them in battle are also wildborn tharrikers that have deadly pounces and swipes.
All of the Recollection Leaders dash across the battlefield to avoid damage. Keeper Taman raises his shield to ‘collect’ lightning, then raises his sword to ‘release’ it creating numerous clouds with lightning bolts.
Focus on Venombow Daital first keeping the other Leaders at bay as much as possible. When any of the leaders are defeated, they will reappear in a spirit form also able to cause damage but the amount is reduced. The spirit forms do not take damage. With Venombow Daital defeated, focus on either Keeper Taman or Greenspeaker Baedalas. Both are aggressive. The remaining will be Rootstrider Maglin. He can cast tangled tree roots on the ground that will pin you if you step near them.
Achievement Earned

The first time you defeat this world boss you will earn the Recollection Victor achievement.
Oakenclaw at Lake Olo
Travel east from the Skingrad Vineyards Wayshrine to find Lake Olo.


Mechanics Notes
Lake Olo is the most chaotic and most difficult world boss of the Gold Road chapter. Oakenclaw is powerful and summons plenty of allies to assist her. Oakenclaw casts green glowing orbs in fast-moving aoes. Wild Guar will run to you inflicting damage. They are easily defeated but there are quite a few of them. The next enemy to be on the lookout for is the Venombows. These are spriggans that shoot arrows! Their ranged attacks are very damaging. Other spriggans have battle axes that, when slammed, create a large aoe. Forest Wraiths who are similar to spriggans appear. They jump and when they land create a massive aoe. The last type of spriggan is a Colossal Spriggan. Its attacks are the same but on a much grander scale.
Fauns also enter the battle. Some Fauns cast electrical bolts, others use arrows, and some will charge at you. The Fauns with hammers will jump and slam the hammer into the ground creating large aoes. A few Fauns have a pull skill that will pull you to them.
From time to time you will notice glowing trees appear. These have poisonous roots and cause damage called root corruption. Spriggan senche-monarchs (skeletal dog-type creatures) also appear and are aggressive and numerous like the wild guars.
Oakenclaw will momentarily disappear and a Distributory will appear in her place. While you can damage the Distributory, note that when you kill it, it will explode.
At about 2 million health (after starting at 4 million) a giant bear appears. This is Bloodmaw. Like other bears, it will swipe, claw, bite, and raise on its hind legs slamming into the ground creating an aoe.
This is a tough battle. You will need to be moving a lot and be very mindful of the aoes. Keep the enemies down as much as possible and deal damage to Oakenclaw whenever you can.
Achievement Earned

The first time you defeat this world boss you will earn the Oak Hewer achievement.
What Is A Wayshrine?
Wayshrines are shrines that were built to honor the Divines by being a safe haven point where players can revive if you die while adventuring in Tamriel. Once you visit a wayshrine, it becomes available on your map for you to use to fast travel at no cost. You can also travel to any unlocked wayshrine from anywhere in Tamriel for a price paid in gold. This price reduces with time and also can be reduced by champion point allocations. Each zone begins with one available wayshrine.

On your map, wayshrines will appear with a blackened wayshrine icon when you are close to its location. Once the wayshrine has been visited, the icon turns white.

West Weald Wayshrine Locations
There are 14 wayshrines in West Weald.
- Centurion’s Watch Wayshrine
- Fall’s Path Wayshrine
- Feldagard Keep Wayshrine
- North Hook Wayshrine
- Ontus Wayshrine
- Ostumir Wayshrine
- Skingrad City Wayshrine
- Skingrad Vineyards Wayshrine
- Sutch Wayshrine
- Three Points Wayshrine
- Trader’s Luck Wayshrine
- Vashabar Wayshrine
- Valente Vineyards Wayshrine
- Wildburn’s Edge Wayshrine
What Is A Zone Daily Quest?
Zone daily quests are daily repeatable quests throughout Tamriel. Each zone has its own dailies which are usually given by a NPC. Typically zone dailies include completing activities in delves, killing world bosses, or completing zone-specific tasks.

On your map, zone daily quests appear as blue highlighted arrows. Once completed the arrow disappears until the next day.

Zone Daily Quests In West Weald
There are three types of zone daily quests in West Weald. You can find the NPC quest givers just west of the Skingrad Wayshrine in the area just south of The Great Chapel of Julianos as marked on the map.
You will first need to take the quest ‘Skingrad Seeks Adventurers!’. You can find this quest posted to a street light along the street from the wayshrine to the chapel.


Lieutenant Agrance will give you a daily zone quest involving one of West Weald’s world bosses.
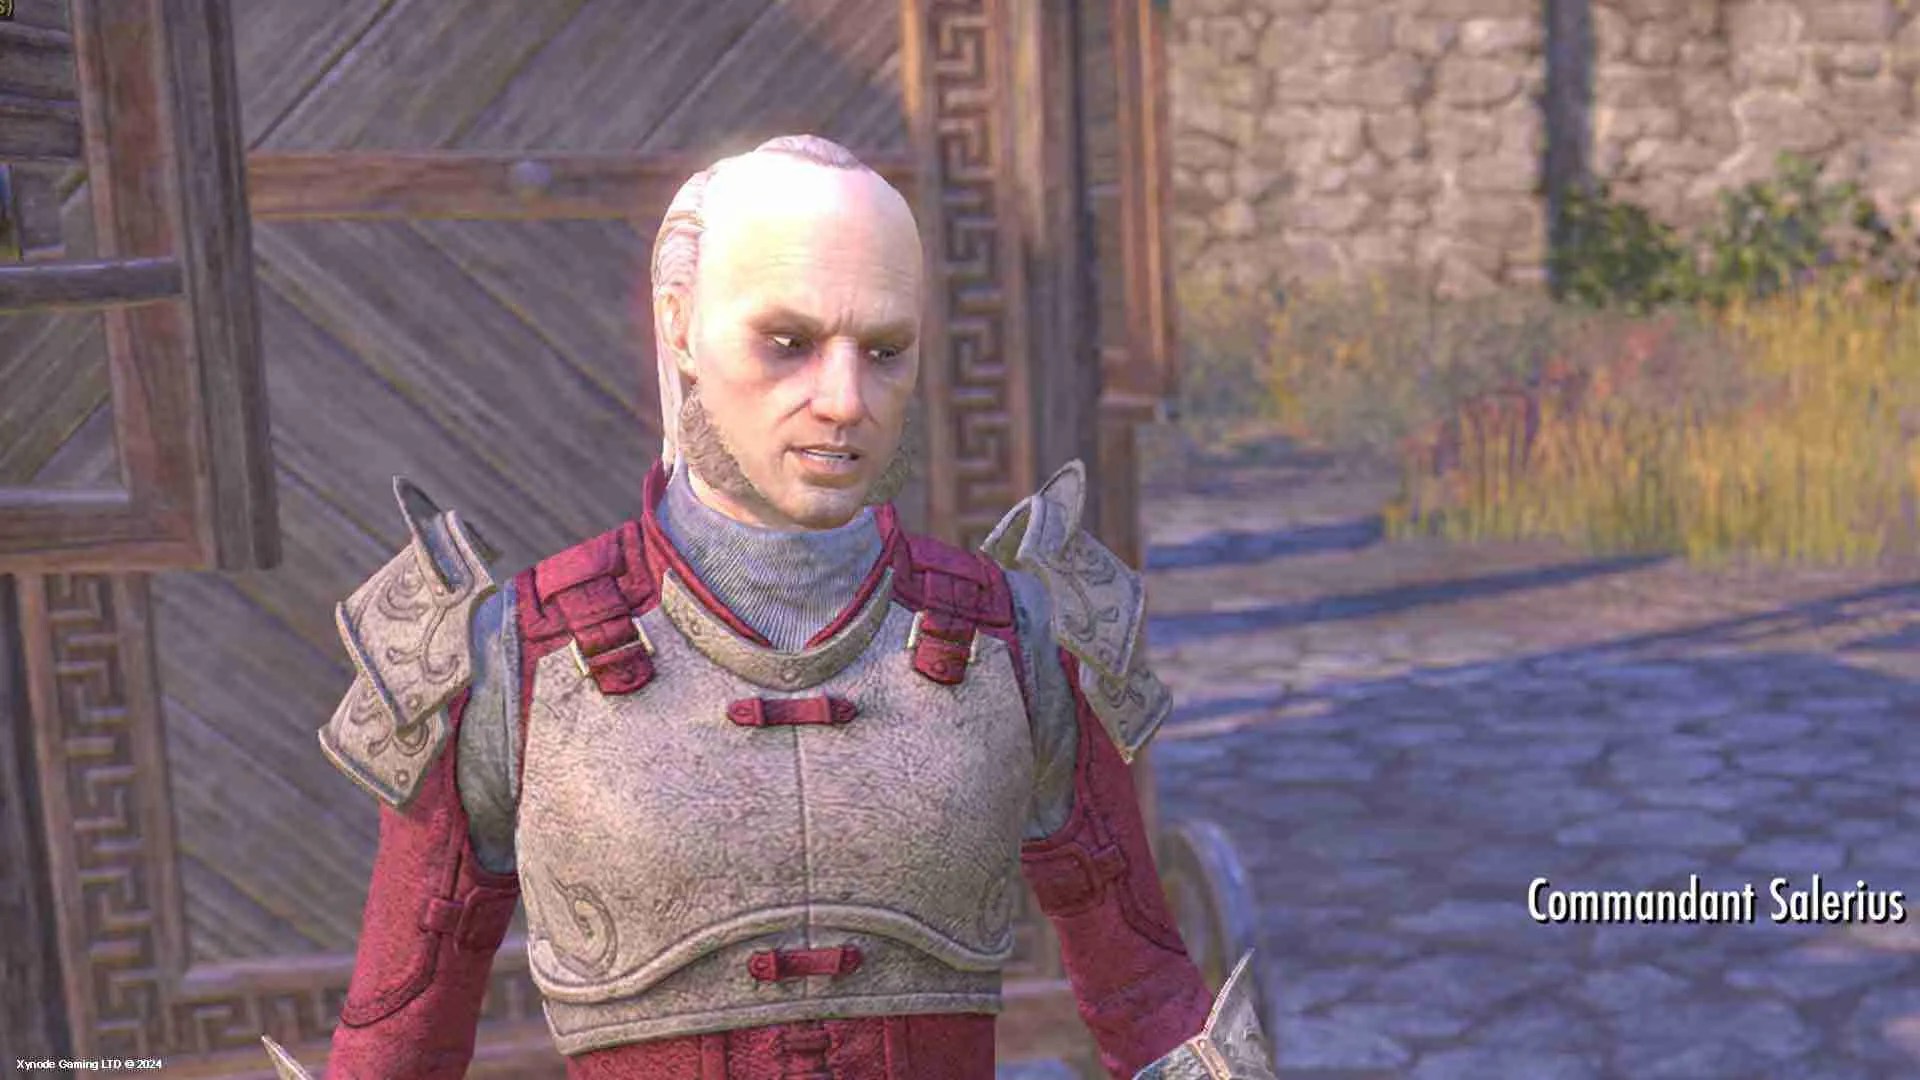
Commandant Salerius will give you a daily zone quest involving one of West Weald’s delves.
Legionary Jaida Mirrormoor will give you a daily zone quest involving one of West Weald’s Mirrormoor incursions.


What Is A Skyshard?
Skyshards are glowing crystals that provide you with 1/3 of a skill point. Collecting 3 skyshards grants you 1 skill point which can then be used for abilities and/or passives.

On your map, skyshard will appear with a blackened skyshard icon when you are close to its location. Once the skyshard has been collected, the icon turns white but then disappears from your map.

Once you collect all the skyshard from the zone, you will earn the Auridon Skyshard Hunter achievement.

West Weald Skyshard Locations
There are a total of 18 Skyshards in West Weald.
Skyshard #1 – on a ledge overlooking the river Strid
Skyshard #2 – on the porch of a locked barn
Skyshard #3 – in a cave near the path
Skyshard #4 – overlooking the gorge outside Skingrad Castle
Skyshard #5 – on a rock ledge over Rock Bottom Caverns
Skyshard #6 – on a tree stump at Deserter’s Lagoon
Skyshard #7 – on a rock ledge overlooking a wheat field near Centurian’s Rise
Skyshard #8 – outside the river gate of Varen’s Watch
Skyshard #9 – at the entrance of a collapsed cave overlooking the creek’s widest point
Skyshard #10 – near the top of an overgrown Ayleid ruin
One skyshard is also found in each of the six delves and one in each of the two public dungeons. Maps with exact locations are provided in those sections.
What Is A World Event?
Mirrormoor Mosaics or Incursions are a new type of world event introduced in West Weald, part of the Gold Road chapter released in Q2 2024.
An active mosaic location will have a large glowing shard in the sky with 3 beams each shooting orbs in different directions. You will need to follow the direction of the orbs to find a Valkynaz champion. There are 6 Valkynaz champions in total and their appearance is random. Each incursion consists of 3 Valkynaz Champions.
Initially, the Valkynaz champion will be inside a protective orb. You must defeat all the surrounding daedric enemies before the orb disappears. You will encounter other ‘environmental hazards’ specific to each Valkynaz champion. The Valkynaz champion battle will end at about half health. He will then disappear. You must return to the mosaic location and follow another shooting orb. You will repeat this process until you have ‘defeated’ 3 Valkynaz champions.
Upon returning to the mosaic after the third champion’s defeat, you will encounter a random powerful daedra enemy. During this battle, the three partially defeated Valkynaz champions will reappear. You must defeat them all to complete the mosaic.

On your map, world events will appear with a blackened world event icon when you are close to its location. Once the event has been defeated, the icon turns white.

West Weald World Event Locations
There are 4 world events in West Weald.
- Colovia Mirrormoor Mosaic
- Ostumir Mirrormoor Mosaic
- Silorn Mirrormoor Mosaic
- Sutch Mirrormoor Mosaic

On your map, when a world event is active, the crossed swords icon will appear and flash behind the world event icon.


What Is A Lore Book?
Shalidor’s Library is a collection of lore books in Tamriel. Reading lore books within this collection increases your Mages Guild rank.

On your map, lore books will appear in your compass as you near it. Once collected, it will disappear. You can track your collection under the zone guide.

West Weald Lore Book Locations
There are a total of 9 lore books to be found in West Weald.
- Lore Book #1 – The Cleansing Of The Fane – on a crate outside the entrance door of Rock Bottom Caverns
- Lore Book #2 – Varieties Of Faith, The Forebears – on the floor of a gazebo
- Lore Book #3 – Nine Commands Of The Eight Divines – on the porch of an abandoned house next to a backpack
- Lore Book #4 – Magic From The Sky –
- Lore Book #5 – Eulogy For Emperor Varen –
- Lore Book #6 – The Humor Of Wood Elves – on a tree trunk table inside tree roots
- Lore Book #7 – The Wedding Feast: A Memoir – on the ground near a pile of rocks
- Lore Book #8 – Varieties of Faith: The Wood Elves – on a tree trunk table
- Lore Book #9 – Ayleid Survivals In Valenwood – beside a backpack on the ground near piles of lumber
If you find more lorebooks NOT listed, please contact support@xynodegaming.com.
What Is A Treasure Map?
Treasure Maps are rewards that show the location of special chests that can only be seen when you have the map in your inventory. You must travel to the specific location, dig the dirt mound, and then a chest will appear for you.
Treasure Map locations do NOT appear on your map. You can slot the maps for quick access to compare your location.

This map uses the chest icon to denote the location.

West Weald Treasure Map Locations
Note: If you pre-purchased the Gold Road chapter, you were rewarded with 3 special treasure maps that are noted on this map.
- Pre-Purchase Treasure Map I – on a rock ledge overlooking the river near colorful shrubs
- Pre-Purchase Treasure Map II – on a rock ledge in dead grass looking toward the corner tower
- Pre-Purchase Treasure Map III – at the base of tangled tree trunks
- Treasure Map I – at the base of stone edging around a large tree
- Treasure Map II – in tall weeds next to a tree stump
- Treasure Map III – near rocks overlooking the lake
- Treasure Map IV – near 2 tree stumps and a tree
- Treasusre Map V – near a rock ledge looking at the waterfall
- Treasure Map VI – on a rock ledge halfway up a waterfall
West Weald Summary
West Weald, a zone in The Elder Scrolls Online: Gold Road DLC, is a lush, temperate region in southeastern Cyrodiil within the Aldmeri Dominion, blending rolling vineyards, golden fields, and Ayleid ruins with the cosmopolitan city of Skingrad as its central hub. Marked by Colovian culture and verdant landscapes, it features dense forests, river valleys, and the encroaching influence of the Dawnwood jungle tied to Valenwood.
The main storyline, part of the Gold Road arc, centers on investigating the chaotic spread of the Dawnwood, confronting the Recollection, a splinter group of Wood Elves, and unraveling mysteries linked to the Daedric Prince Ithelia intelligentsia.
The zone offers six delves, six world bosses, skyshards, lorebooks, and crafting stations for sets like Spell Parasite, alongside public dungeons and world events. Its vibrant, diverse terrain and narrative of Daedric intrigue, political upheaval, and ancient Ayleid secrets provide an engaging, accessible experience for all players, emphasizing exploration and faction-neutral adventure.
Recent Articles
CloverPit on PS5 and Switch: The Slot Machine Is Only Half the Game
In today’s Gaming Guest Blog, is about how online slots are changing and how CloverPit is affecting PS5 and Switch!
ENJOY!
A Longer Progress Bar Does Not Create a Deeper Game
In today’s Gaming Guest post, is about how longer progress bars don’t technically make a game “deeper”.
ENJOY!
Why players are tiring of reward systems
In today’s Gaming post we talk about the shift in game development and how ALL types are fighting for as much of your time as possible.